Yes, I hate myself for it, but that pun was too easy to pass up.
The first step of construction isn't the cutting of materials, but the construction of the rib jig. This jig will be the template on which the 6 long ribs, 6 short ribs, aileron ribs, and butt rib of each wing panel are constructed. In total there are 26 ribs plus 4 end caps for the ailerons.
The pieces of each rib will be laid into the jig, gussets glued and nailed to one face, rib removed and flipped, and gussets glued and nailed to the other face. Repeat ad-nausea.
I'll be gluing with T-88 epoxy and so it's important that if I have squeeze-out I can still remove the rib from the jig. To aid in this I'm laying the jig out on a melamine shelf and coating the jig blocks in liquid floor wax.
The first step in all this is drawing out the rib full size on the melamine base. My copied set of plans are slightly undersized, so I had to use the originals. In an attempt to save them from any damage I dragged out my drafting supplies and made a tracing, making sure everything was the correct size. Then I had to get that onto the melamine. I wanted to use carbon paper, but couldn't find mine. So, I did the next best thing and made my own with some black pastels and drafting vellum.
 With the outline transferred to the melamine shelf material I was able to start nailing the jig-blocks in the spar locations and around the outline of the airfoil.

 I made a jig to rout nose blocks out of the 1/4" plywood. First they were laid out on the plywood, then rough cut. These rough cut blanks were then hammered onto locating pins in the jig, routed to shape and removed for the next one. Below is a picture of the rough blank in the jig. Accompanying it is a video of the process for anyone who's interested.

With all 26 nose blocks made and 2 spares made I had done about all I could until the capstrips arrived. Fast forward 3 weeks to the end of a boat delivery; the capstrips had arrived and I could cut the stock for one rib, laid out in the jig.
 Once the jig was laid out I was able to add jig blocks to both sides of the framing members and hold them in place. Thus done, everything is locked in place and I can take these cut capstrips and use them to production-line the pieces of the same length for the other 25 ribs. That about covers it for the jig. Next time we'll cover cutting gussets.
The first step of construction isn't the cutting of materials, but the construction of the rib jig. This jig will be the template on which the 6 long ribs, 6 short ribs, aileron ribs, and butt rib of each wing panel are constructed. In total there are 26 ribs plus 4 end caps for the ailerons.
The pieces of each rib will be laid into the jig, gussets glued and nailed to one face, rib removed and flipped, and gussets glued and nailed to the other face. Repeat ad-nausea.
I'll be gluing with T-88 epoxy and so it's important that if I have squeeze-out I can still remove the rib from the jig. To aid in this I'm laying the jig out on a melamine shelf and coating the jig blocks in liquid floor wax.
The first step in all this is drawing out the rib full size on the melamine base. My copied set of plans are slightly undersized, so I had to use the originals. In an attempt to save them from any damage I dragged out my drafting supplies and made a tracing, making sure everything was the correct size. Then I had to get that onto the melamine. I wanted to use carbon paper, but couldn't find mine. So, I did the next best thing and made my own with some black pastels and drafting vellum.


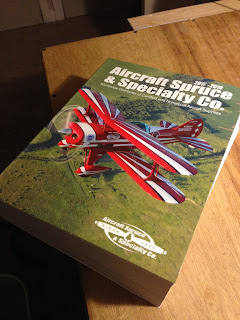
That was as far as I could get without spending some real money. Now I
had to really bite the bullet. Aircraft Spruce filled most of the order
fairly quickly. Half a sheet of 1/4" birch plywood, a full sheet of
1/16" birch plywood for gussets, a pound of 1/4" aircraft nails, and
some T-88 epoxy. The 1/4"x1/4" capstrips were backordered.

 I made a jig to rout nose blocks out of the 1/4" plywood. First they were laid out on the plywood, then rough cut. These rough cut blanks were then hammered onto locating pins in the jig, routed to shape and removed for the next one. Below is a picture of the rough blank in the jig. Accompanying it is a video of the process for anyone who's interested.
With all 26 nose blocks made and 2 spares made I had done about all I could until the capstrips arrived. Fast forward 3 weeks to the end of a boat delivery; the capstrips had arrived and I could cut the stock for one rib, laid out in the jig.
 Once the jig was laid out I was able to add jig blocks to both sides of the framing members and hold them in place. Thus done, everything is locked in place and I can take these cut capstrips and use them to production-line the pieces of the same length for the other 25 ribs. That about covers it for the jig. Next time we'll cover cutting gussets.
Comments
Post a Comment